


The word "Robot' literally means a "Slave" or a "Labourer'. Thanks to advancements in Artificial Intelligence, robots are no longer just part of Issac Asimov's Sci-Fi novels. Its possible to build a simple robot that can do your bidding at home. Lets see how we can put together few basic parts and make a cool robot at home. To begin, lets list out all the components that we'd need.
Pre-requisites :
1) Basic working knowledge of Electronics.
2) Patience.
Components Required :
1) Microcontroller board - 01
2) Motor driver boards - 02
3) DC geared motors - 04
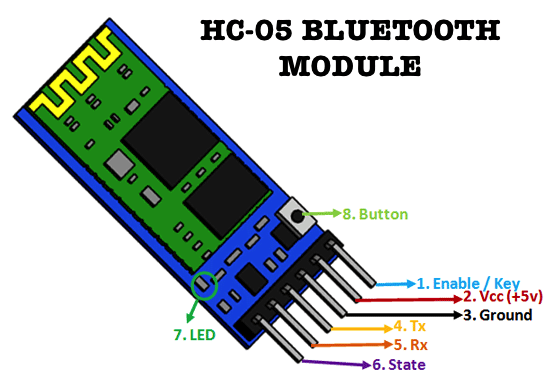
4) HC-05 Bluetooth Module - 01
5) Batteries - either 12V Lead Acid or LiPo battery.
You can either buy these components discreetly or buy a cool robotics kit that houses all these components together from your nearest Tweak Labs Inc. store. This awesome kit designed by team Tweak Labs in conjunction with NETRA - an ESDM accelerator serves the needs of hobbyists working at an advanced level or even beginners. So what does the kit contain?
Accexlron ROBOTICS KIT :
1)XLR-8 RAPID PROTOTYPING BOARD -01
2)DC GEARED MOTORS - 04
3)4-WHEEL ROBOT CHASSIS - 01
4)HC-05 BLUETOOTH MODULE - 01
5)CONNECTING WIRES - A FEW.
So if you have got your hands on all these cool components, then its time.
"Beam me up....Scotty!"
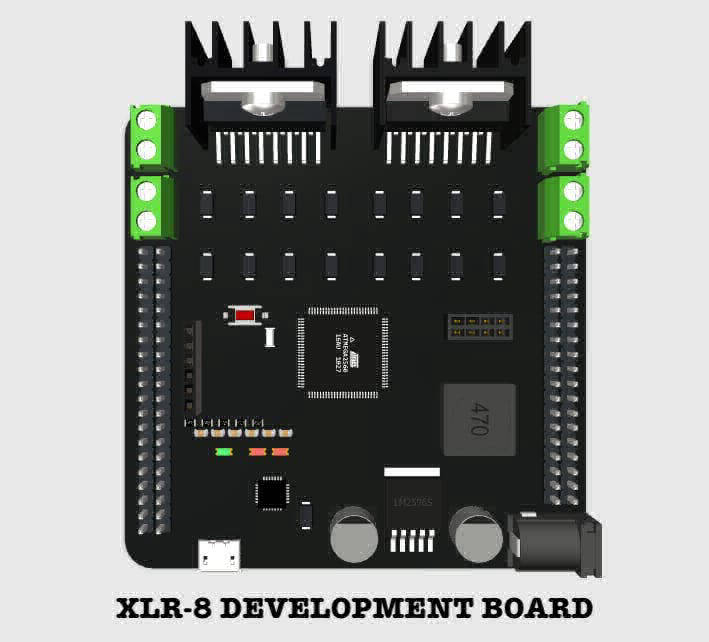
The most important part of the robot is the microcontroller unit. A microcontroller is like a brain of the robot that tells the rest of the parts like motors how to run. But a microcontroller by itself doesnt have enough oomph to drive the motors, it needs to have an intermediate "driver board" which is usually referred to as a L298 Motor Driver Board. After a lot of research we decided to come up with our own microcontroller board with advanced capabilities. Since it is suppossed to help you arrive at your prototype at a much faster pace we decide to name it - XLR-8.
Accexlron is an improvement over existing boards like Arduino Uno and Mega. The board comes with built-in capabilty of driving motors and also allows plug and play compliancy for bluetooth and wifi capabilites. The board is designed to help overcome the redundant activities that take up a lot of time while arriving at your prototype, for example - supplying the right voltage or current.
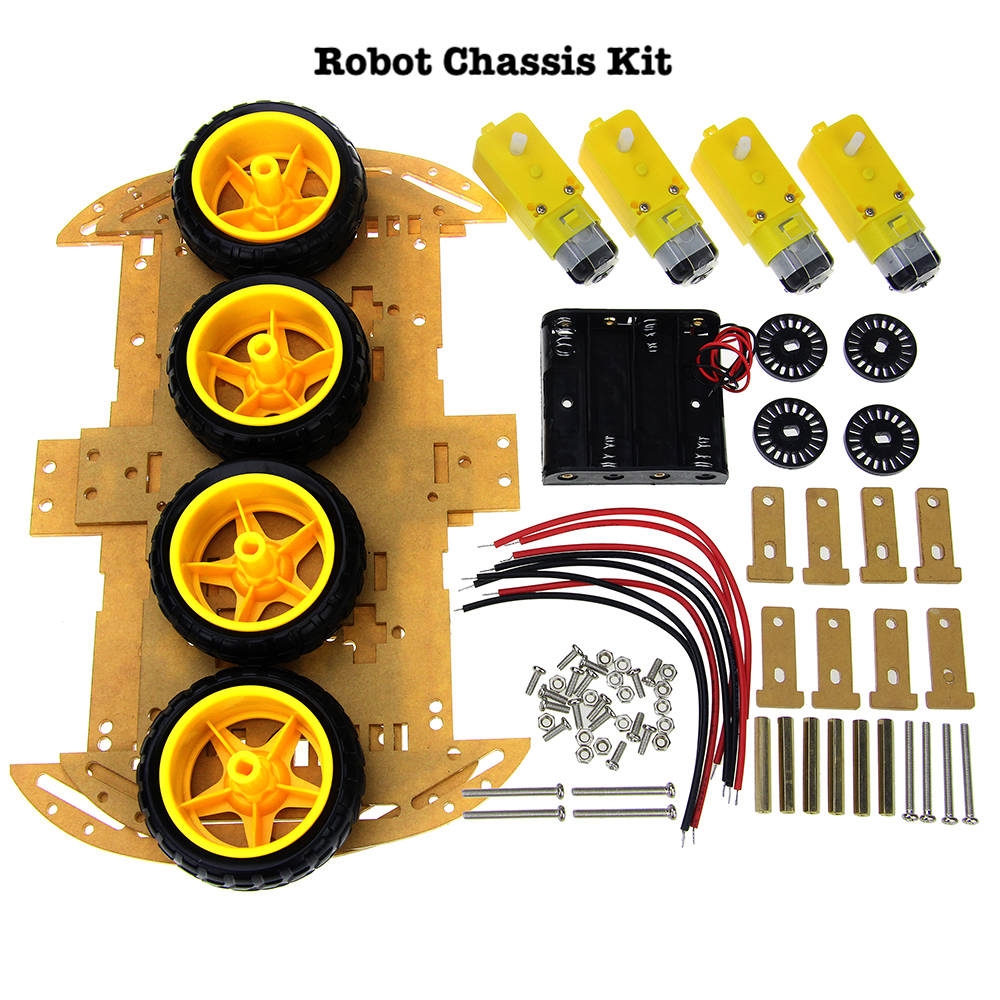
So lets begin. The components in the kit are show in the picture below. The steps for putting together your very own bot are as below:
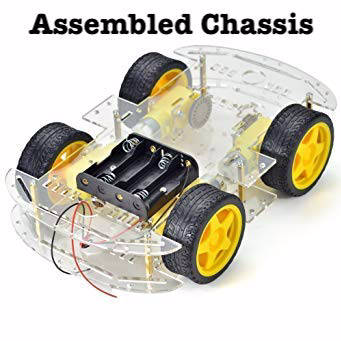
1) Assemble the robot chassis kit. The robot chassis is made out of special acrylic material designed to withstand a decent amount of stress. The kit comes with appropriate spacers and screws to put together the chassis.
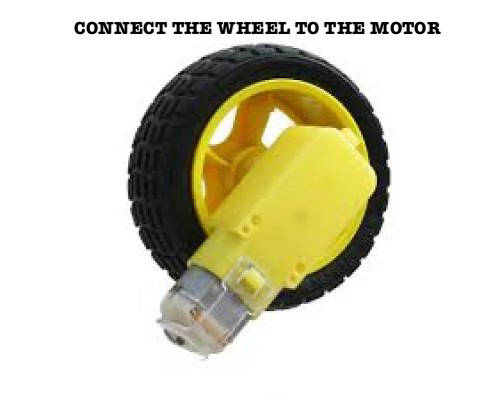
2) The DC geared motors supplied in the kit will be mounted on one of the robot chassis.
3)Before mounting the motors onto the chassis, take the connecting wires and solder them to the motor's terminals. The usual convention is to follow red for positive and black for negative.
4)After the wires are soldered onto the motor and mounted onto the chassis. We will program the Accexlron development board. To program the board, download and install the Arduino IDE onto your computer and get a micro usb cable.
5)Connect the microusb cable to the board and connect it to your computer with the newly installed Arduino IDE software open. Go to Tools --> Boards --> Arduino Mega2560.
6) Upload the code.
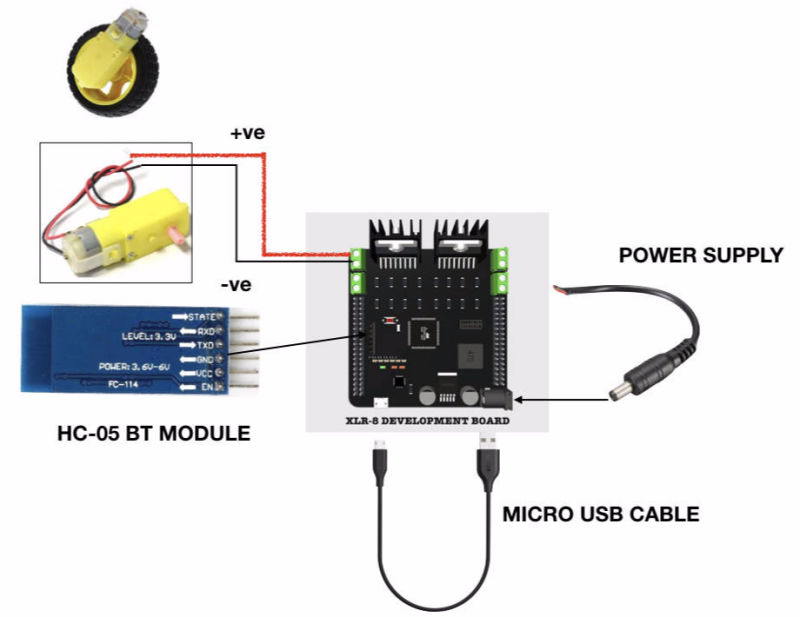
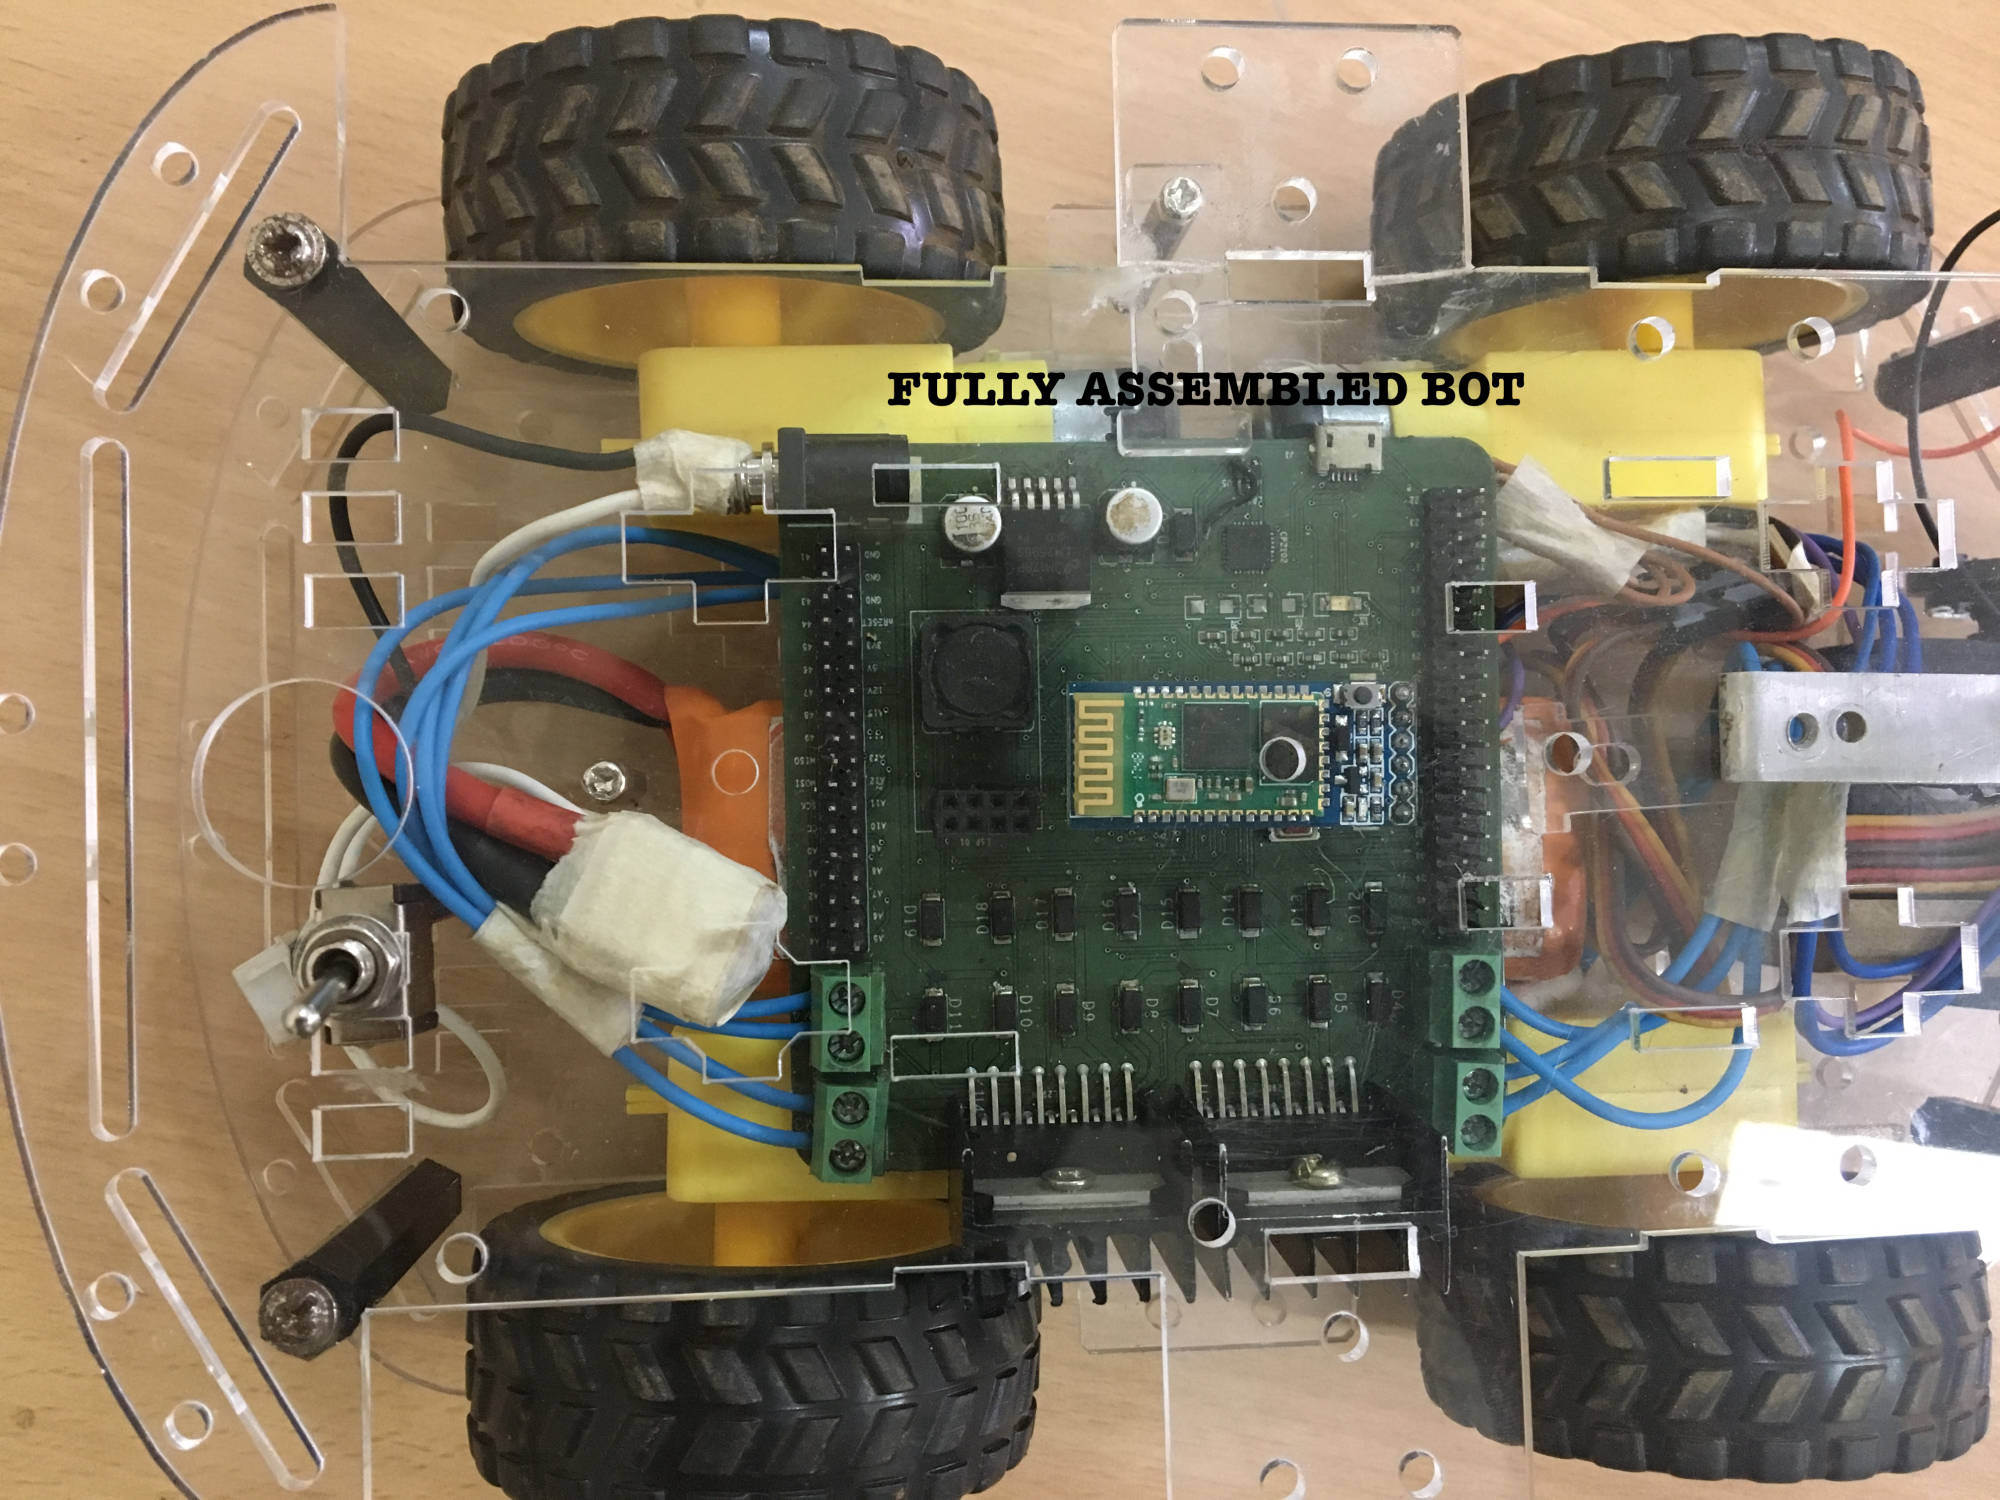
7)After the code has been uploaded onto the board. Now make the rest of the connections as shown in the figure below.
8)Download this app from the Google Play Store and install it.
9) Now launch the app and pair your phone with the bluetooth module present on your bot. If it asks for a passcode type either 1234 or 0000.
10) Voila! Your bluetooth controlled robot is ready!
Accexlron actually simplifies the whole process of building the robot, because the user doesnt have to bother about buying separate motor driver boards and then struggle to interface them with the microcontroller. The board seamlessly integrates all these features onto a single board.


SHARE THIS PAGE!